Search
Categories
Have a request?
This form does not yet contain any fields.


    Entries in made by a man (12)

    Tuesday
    Sep062011

    epic sammich is epic

    There's nothing quite like muffaletta.

    This is my last post before school starts. And my last paycheque so I went nuts at the fancy Italian deli. That place is freaking dangerous. Imported salamis, locally made cheeses, a dessert cooler with my nose print on it...

    They even make fresh pasta in the store right in front of you. But I was not looking for hand hung linguini, oh no, I went straight to the back of the store (by some definition of straight that involves  stopping at the bakery, the jam aisle, the spice section, and the espresso counter) and started perusing the sausages.

    I do love a nice hard salami.

    Especially when it's stuffed into a muff... alletta.

    Oh, come on, I had to. As if you weren't thinking it.

    Muffaletta, the epic sammich of epicness

    What You Need:


    Olive Salad

    • 1 jar giardinera pickled veggies mix, hot if you like it that way
    • 1 jar manzanilla olives with pimentos
    • 12 kalamatas
    • 1 jar artichoke hearts
    • 1 jar pickled mushrooms
    • ½ jar capers
    • 2 cloves garlic
    • ¼ c parsley
    • 1 tbsp oregano
    • Vinegar
    • Olive oil

    The Sammich

    • 1 loaf of round sturdy bread
    • 100 g* dry salami
    • 100 g thinly sliced ham
    • 100 g pepperoni
    • 100 g sliced provolone
    • 100 g sliced emmenthal

    *100 g = 1/4 lb for those of you who live in the only country in the world not smart enough to switch to the metric system.


    What You Gotta Do:

    The first thing you need to do is make your "salad." I'm not sure exactly why it's called salad, it's not the kind of thing you'd eat out of a bowl as a first course, or even as a last one, but I can't think of some other way to refer to it. 

    Strain all the jarred stuff and dump it into the food processor.

    If the giardinera has large chunks in it, you might want to chop those up a bit first just for consistency’s sake.

    Coarsely chop the garlic and drop it in.

    Add the parsley and oregano, and black pepper if you remember to.

    Whiz this all for just a few seconds. You don’t want it too fine and homogenous or you lose the “salad” texture and end up with something more like a tapenade.

    You’ll probably want to scrape down the sides then whiz for just a few more seconds to get everything chopped.

    Spoon it back into the bigger jars, or if you have them laying around, 500 mL mason jars work great. You'll be able to fill about 2 of them. Don’t pack it down. You need space in there for the oil and vinegar dressing.

    Splash in a bit of vinegar, about 1 tbsp of vinegar for each cup of salad. White wine is best, but red will also work. Pour in olive oil until most of the space between the tiny chunks is filled.

    Put the lid on and give it a good shake.

    Let this marinate in the fridge for a bit. It’ll keep at least a month in the fridge, if it lasts that long. It does make great gift basket fodder, but since it needs to be refridgerated you’d probably have to do the whole “canning” thing if you wanted it to be shelf stable. I’m going to leave that part to Taneasha to tell you about some day.

    It's also great on a cheese and crackers plate, or as a pizza topping, and a few spoonfulls added to a bit of tomato sauce results in a tasty puttanesca perfect for spaghetti.

    Now, to assemble the sammich of epicness.

    Slice your round loaf in half horizontally.

    You want a good sturdy loaf with a crusty exterior and a dense crumb inside. French bread will not work, the insides are too squishy. A good sourdough will do the trick, and that's what I'd planned until I saw the loaf of olive bread at the Italian deli.

    Pull out the innards of the bread, leaving about a centimeter (half inch) of insides all around. You want the same buffer on the bottom and top of the bread.

    Freeze the innards for use later on as crumbs or as the bread in a bread pudding, sweet or savoury.

    The first layer is the olive salad. Top and bottom.

    I guess the rest is kind of up to you how you want to do it,

    but I suggest a single layer of each type of filling,

    with a bit more salad every three, four or five layers.

    Don't be shy about pressing it down and filling it with as much meat and cheese as possible. And make sure you get the layers all the way out to the edges of the bread.

    Once you've filled both halves, flip the top onto the bottom and press them together. I find it's easiest to do if the last layer on the top half is cheese. It seems to stick a bit better and there's less chance of things falling apart.

    Give it one last squish, then fold it up in a giant peice of parchment or wax paper.

    Giant. Lift the edges up and centre the sammich in the bottom. Roll down.

    When you get to the top of the sammich, tighten a bit, then press the sides down, fold them in like you would if you were wrapping a gift, then tuck them under.

    Leave it there as long as you can resist it.

    You can leave it in the fridge overnight even, just make sure you put it in something a little more air tight. This makes it a really handy make ahead lunch meal, like for a picnic or something.

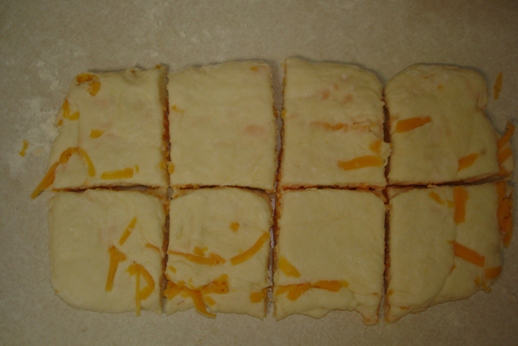
    When you can no longer keep your hands off it, unwrap it and start slicing it into wedges. Belive it or not, it will hold together.

    I recommend slicing it into at least 6, but 8 is better, and do it all now.

    Even if you're not planning on eating it all, slice it. The individually wrapped slices keep quite well. It's also much easier to slice when you have the rest of it around to maintain the structural integrity of the layers.

    Layers!

    So pretty and so freaking tasty.

    What's your favourite layered thing?


    Tuesday
    Aug302011

    How to Impress a Southern Boy

    Show him your biscuits!


    I love biscuits. They’re deceptively simple and infinitely variable. And for some reason they really seem to impress people. As if they’re some kind of fancy or something. Really, they’re not. Yes, it is nice to have freshly baked warm biscuits on the table at any time of day, but the ingredients are basic, and the process is simple.

    To me they will always bring back memories of being flat broke, which is quite apropros to the origin of this dish; it gained popularity shortly after the stock market crashed about a hundred years ago. Recipe Guy’s grandma learned to make them from her mom, who was feeding a family of 6 on less than half an income. I learned how to make them when I cooking with Food Bank ingredients. Every week, I got flour, margarine, and powdered milk. Every week, I made biscuits and ate them for breakfast with jam, for lunch with peanut butter, and for dinner with soup.

    Had I known back then that I could make a cream gravy with those same three ingredients, I’d have been eating biscuits and gravy for breakfast, lunch and dinner.

    Because for all that it really is cheap Depression-era food, it’s freaking tasty!

    Especially when you can dress them up a bit. Like with sharp cheddar in the biscuits and Argentinian beef sausage seasoned with garlic and chives in the gravy...

    Biscuits and Gravy, Northern Style

    What you need:

    Biscuits:

    • ½ c whipping cream
    • ½ c milk
    • 1 tbsp lemon juice
    • ½ c butter
    • 2 c flour
    • 4 tsp baking powder
    • ½ tsp salt
    • ½ c grated sharp cheddar (optional)

    Gravy

    • 1 large sausage
    • 1 tbsp butter and/or bacon fat and/or sausage drippings
    • 1 tbsp flour
    • 1 c milk
    • salt
    • black pepper

    What you gotta do:

    Let’s start with the biscuits. In your measuring cup, mix the cream, milk, and the lemon juice and let it sit for a few minutes.

    I did this because I couldn’t find a smallish container of buttermilk. So yes, you can just use a cup of buttermilk here instead.

    Chop the butter into chunks in a large bowl. For once, I’m not going to tell you to have all of your ingredients at room temperature. Biscuits are more like pastry and pastry is best made with cold butter.

    Add the flour, baking powder and salt to the big bowl.

    With a pastry cutter, or a couple forks, cut the butter and flour together. You can’t do this with warm butter, you end up “creaming” them like you would with sugar and butter for cookies and that’s not the effect we’re going for here.

    What you’re making are tiny chunks of butter covered in flour.

    When you’ve got a nice mixture with a texture kinda like damp sand, make a well in the middle with a spoon and pour in your lemony cream.

    You’re not going to actually taste the lemon in this. That’s not what it’s there for. It’s there to make the cream even more acidic than it already is. The higher acidity will cause more of a reaction with the baking powder (which is alkaline) and you’ll get lighter, fluffier biscuits.

    Mix the cream into the buttery flour until it’s just combined.

    Turn it out onto a floury counter. Do Not Knead The Dough.

    I know it’s tempting, but the last thing you want to do to this stuff is stretch it. Stretching forms gluten and gluten is not flakey. Pat it down into a shape as closely resembling a square or rectangle as you can, then roll it a little flatter. Flour it, fold it into thirds and roll it into a rectangle.

    Since I only needed to feed two people and since biscuits are always better freshly baked, I split the dough in half and froze some for later… (I totally promise to show you what I did with it)

    Roll out the half you’re keeping into a rectangle. You can flour, fold and roll again if you want. The more you do this, the more layers you’ll have in your biscuits and the flakier they’ll be. But once will do, if that’s all you feel like.

    Spread half your grated cheese over the middle, fold one third in. Spread the other half of your grated cheese on top of the folded part. Fold in the other third.

    Roll the cheesey foldey dough into a rectangle and cut it into 8 pieces.

    Bake these at 400 for about 12 minutes until they’re nicely golden and the cheese is melty.

    If you decide to stop here and just eat cheese biscuits, I will totally understand.

    But really, it’s only a few more steps to make the gravy. And you can even do it while the biscuits cook.

    Remove the casing from the sausage and break it up into a hot pan.

    Fry it until it’s golden then remove it from the pan to drain on paper towels.

    Depending on how fatty the sausage was, you may or may not need to add bacon fat, but I recommend a little at least, just for the extra flavour.

    Add the flour and pepper, and sautee them in the fat for a few minutes.

    Slowly pour in the milk, stirring as you go.

    Don’t worry if it gets all clumpy,

    just add a bit more milk and keep stirring.

    You can use a whisk to break up any clumps or a soft spatula to mash them.

    Just keep stirring and adding milk,and maybe a little more pepper,

    and eventually you will have a lovely smooth, happy gravy.

    Add the sausage to the gravy to make it even happier.

    Put a couple of the cheesey biscuits onto a plate and smother them with gravy.

    Um, I need to go make more now.

    What did your family make during the depression?