Apple Crisp
 Taneasha
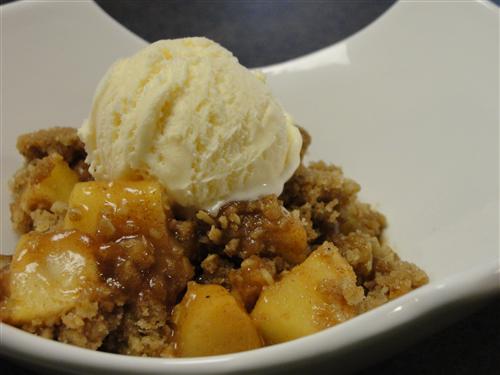
As promised, I’ve made a recipe with apples. Hubby and I went for a drive over the weekend to see the fall colors. While we were out, we stopped at an orchard and picked up some apples. Like everything else, apples bought directly from where they were grown are so much better than the ones shipped from across the country. Then I had the task of figuring out the best way to put them to use. My first thought was to make apple sauce, but that sounded a bit boring. I’m not really that much of a pie making person. I prefer to leave that to the professionals. Lose the crust and add lots of spicy, crumbly topping, and now you’re talking. Apple crisp is such a simple dessert, yet it’s fabulous enough that you’ll even see posh versions of it in fancy restaurants. It’s really the perfect thing for those of us who are slightly pastry impaired.
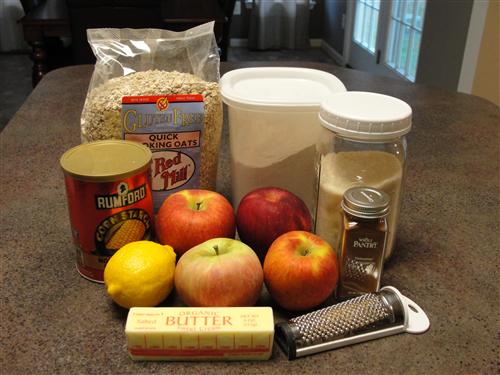
Here’s what you’ll need:
- 4 medium sized apples
- 2 Tablespoons lemon juice
- 1 Tablespoon corn starch
- 3 Tablespoons sugar
- 1 teaspoon cinnamon
- 1/2 teaspoon nutmeg
- 1/4 teaspoon salt
For the topping:
- 1/2 cup butter, softened
- 2/3 cup oats
- 2/3 cup whole wheat flour
- 2/3 cup sugar
- 1 teaspoon cinnamon
- 1/2 teaspoon nutmeg
- 1/4 teaspoon salt
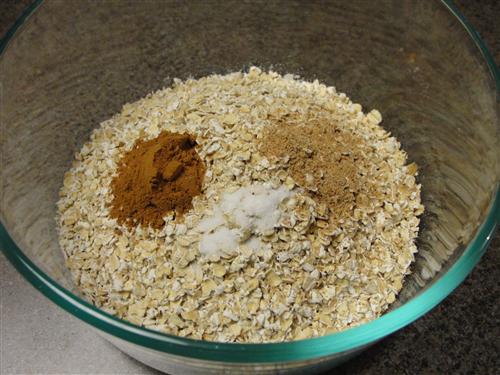
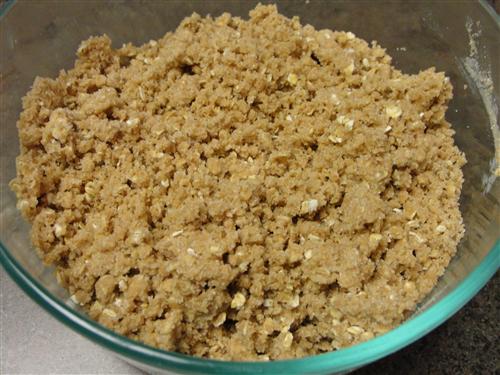
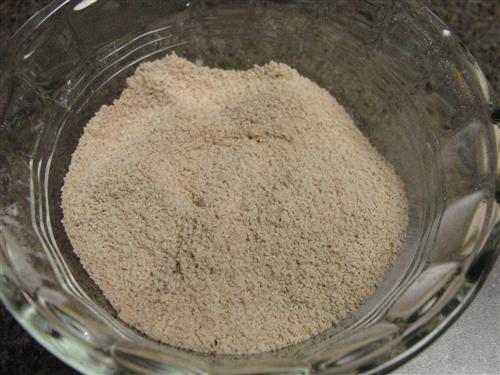
First up is the topping. In a bowl, mix together everything but the butter.
Then, reserve 1 Tablespoon of the butter for the baking dish, and throw the other 7 Tablespoons into the bowl.
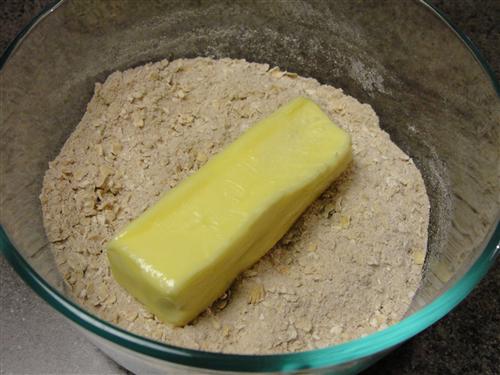
Using a fork, smoosh everything around until you get a nice crumbly mixture.
Set that aside, preheat the oven to 350° and we’ll start on the apples. As always when baking with apples, it’s best to use a variety of them if you can. First, squeeze 2 Tablespoons into a mixing bowl. You could use one of these gadgets for processing the apples. They definitely make short work of peeling, coring, and slicing.

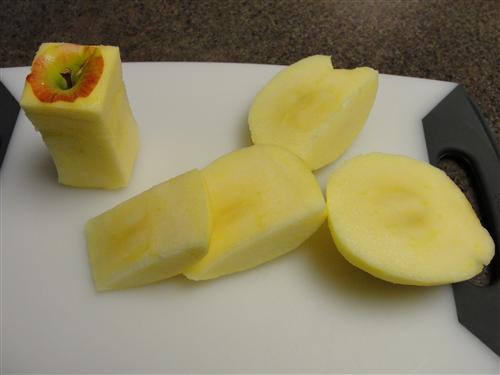
My problem with them is that I don’t particularly like thin slices for crisp. So this is how I like to do it. Peel the apple, then cut off the 4 sides leaving the core.
Then, cut those into chunks.
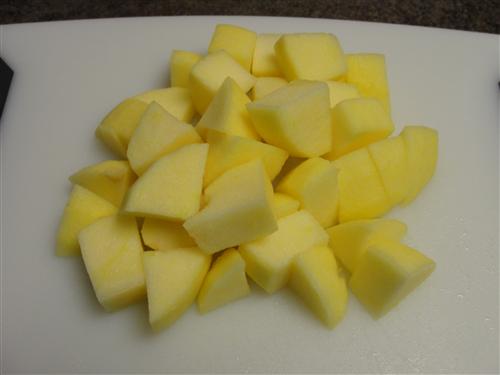
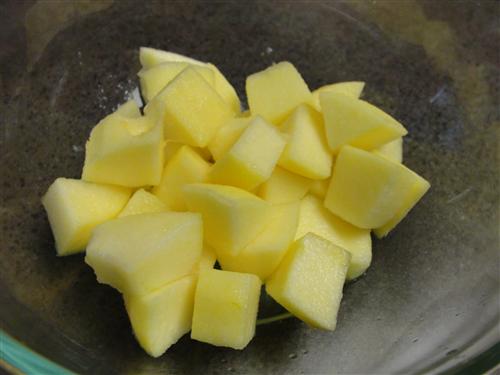
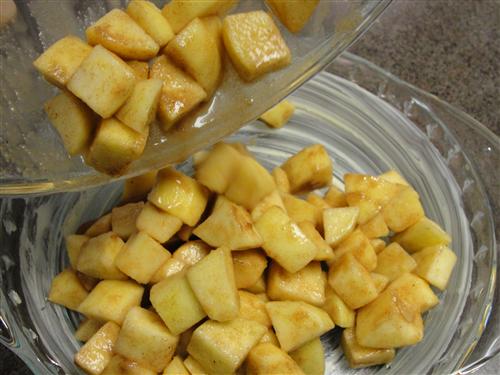
Drop them into the bowl and toss them with the lemon juice as you go.
Now, into a small dish go the corn starch, sugar, cinnamon, nutmeg, and salt.
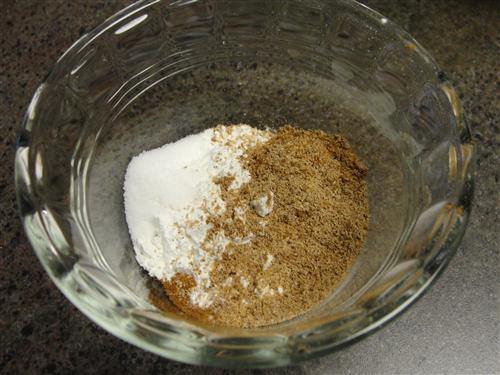
Mix them together until everything is evenly distributed and there are no more lumps of cornstarch or anything.
Sprinkle that over the apples.
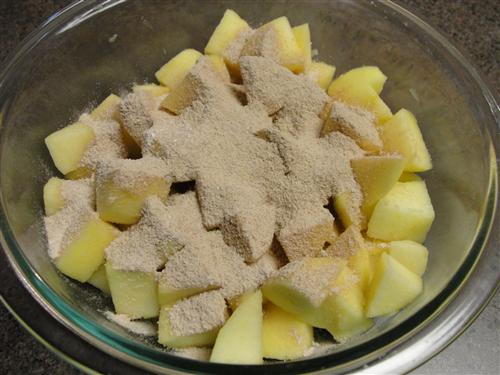
Toss or stir until they’re all evenly coated.
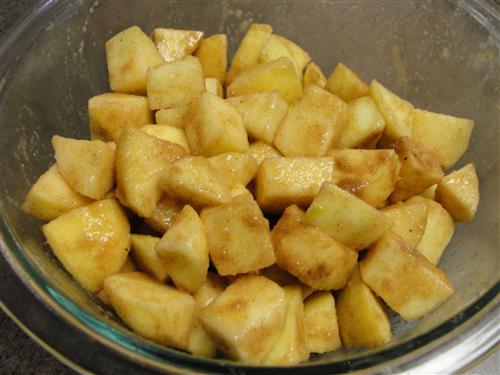
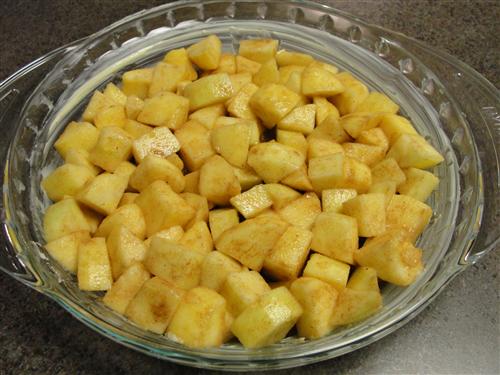
I like to use a large shallow pie pan for this. It makes for a good fruit to crisp ratio and also allows the apples to cook evenly. This dish isn’t rocket science, though, so use whatever size pan suits you. If you want it to be a bit fancier, you can even bake individual servings in small ramekins. Personally, I like the more rustic approach. Whatever you’re using, butter it liberally.

Pour in the apples, making sure to scrape every last bit of juicy goodness from the bowl.
Spread them to the edges of the pan and level them out.
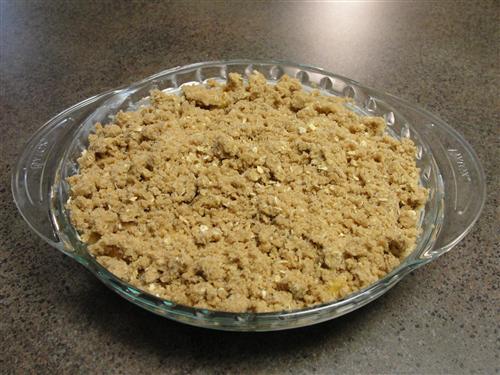
Sprinkle on the topping. As mentioned when I made sweet potato crisp, there is no such thing as too much topping.
Now into the oven for 45 minutes. When it’s ready it will be nice and bubbly around the edges and beginning to brown on top. Look at that beauty! Isn’t it amazing what a little time in the oven can do? Not to mention, your house will be filled with the aroma of baking apples and spicy, buttery goodness.
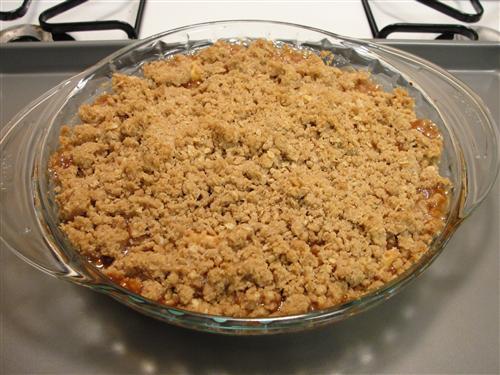
Now for the hard part. Any fruit crisp really needs to rest for at least 20 minutes before serving. It’ll be hard, but I promise it’s worth the wait. Top with some good vanilla ice cream, because I’m pretty sure it’s blasphemous to serve apple crisp without it, and enjoy.

What are you making with apples this fall?
Taneasha, dessert 


